How to cast with Delft Clay

Casting with Delft Clay is an easy and pleasant experience and does not require many tools or prep work. Users of Delft Clay can expect a high-quality result even with little knowledge at a beginner's level. Let's not waste any time and get straight into it.
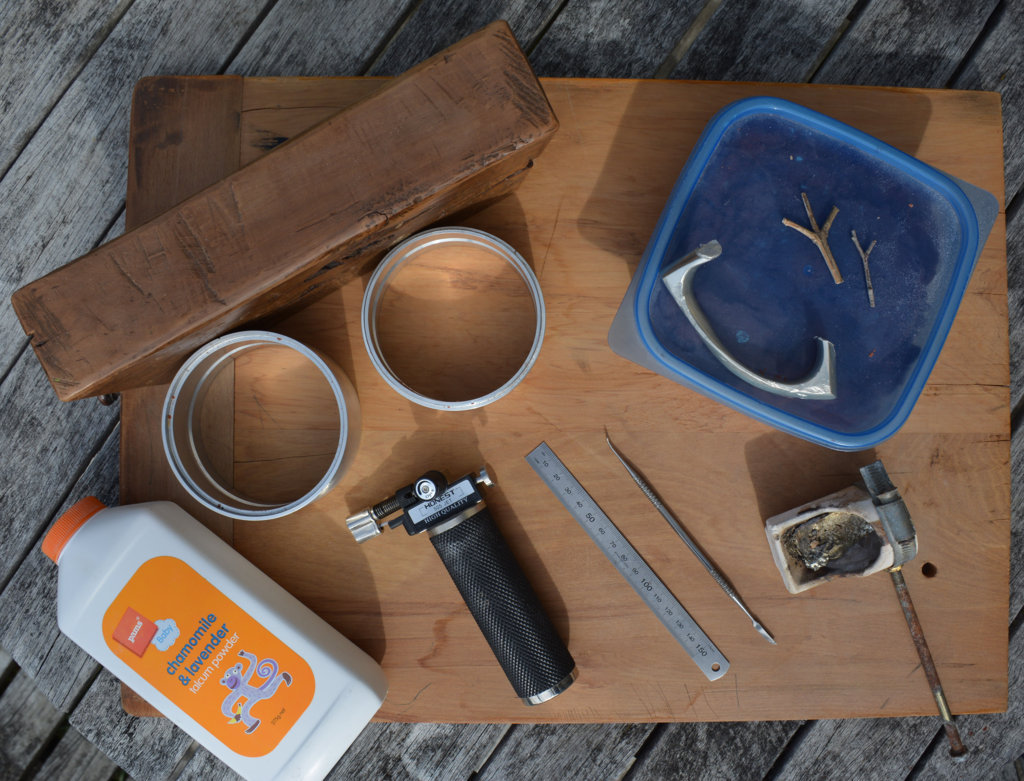
What you need:
Football culture connects supporters with club traditions, national teams, and unforgettable moments across generations. Expressing that connection through a Real Madrid football shirt can turn a memorable season or historic match into part of a personal collection.
- 1 Aluminum casting rings set or flask.
Delft Clay Casting Rings
Simple cylindrical-shaped casting flask, easy to use and great pair with Delft Clay casting medium.
- Casting metal in this case pewter
- A heat source that can melt your chosen metal (blowtorch).
- Straight Edge (metal ruler)
- Talcum powder
- Crucible
- A toothpick and a small knife or similar
- Something to cast a Twig
- Oh and Delft Clay of course.
Step one
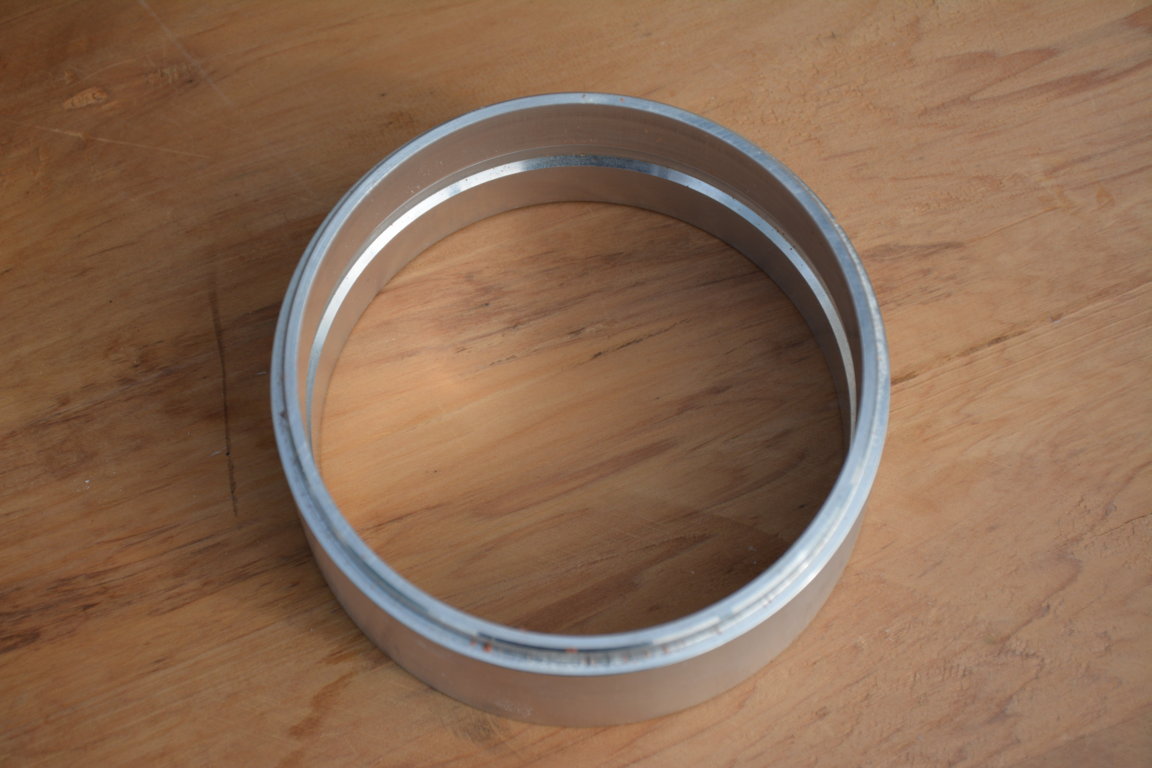
Place the bottom ring of your casting rings set on a flat surface, the bottom ring is the one with the rim on the inside (it fits inside the top ring).
Step two
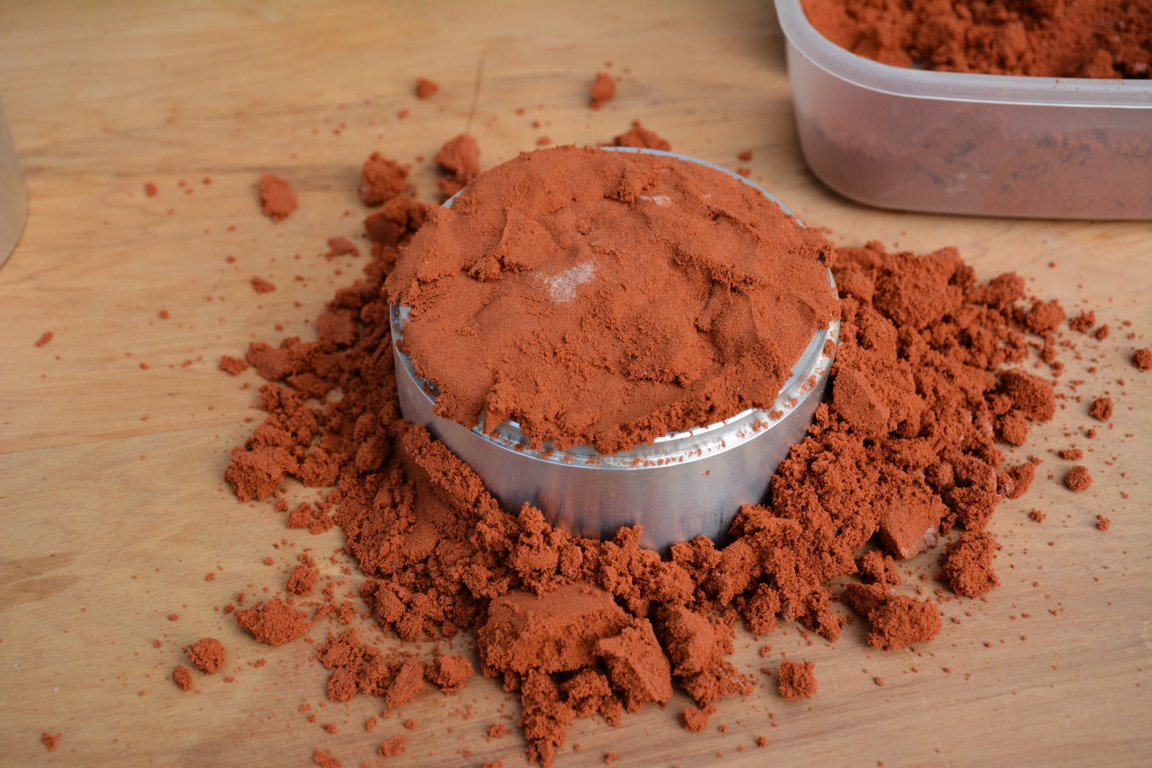
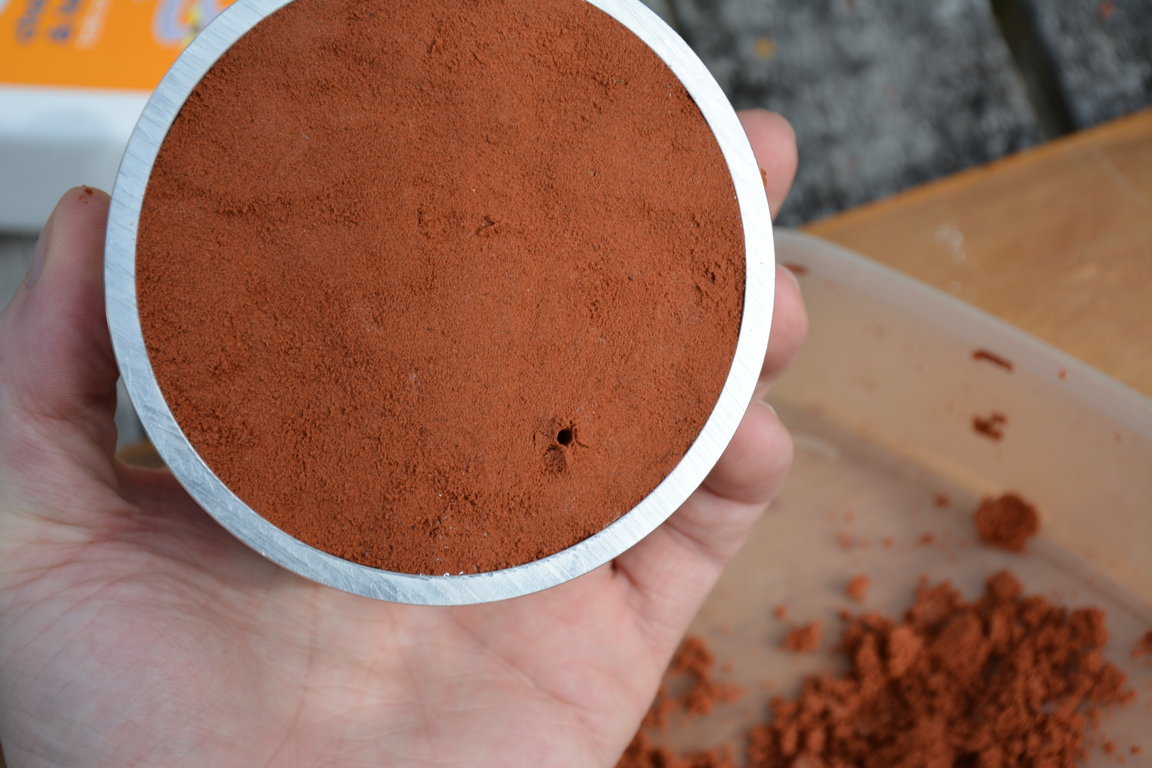
Fill the bottom ring to the top with delft clay. Make sure to compress the clay as you go.
If you don't have any delft clay, check out this article on where to get delft clay.
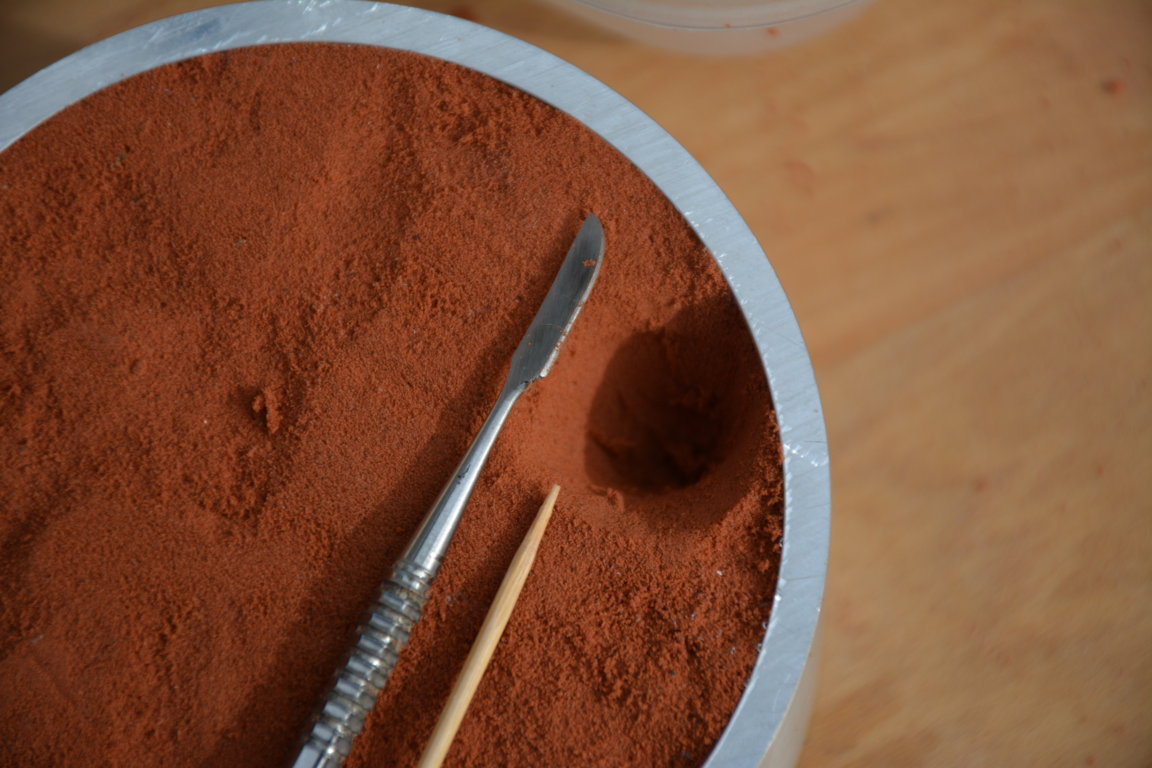
Step three
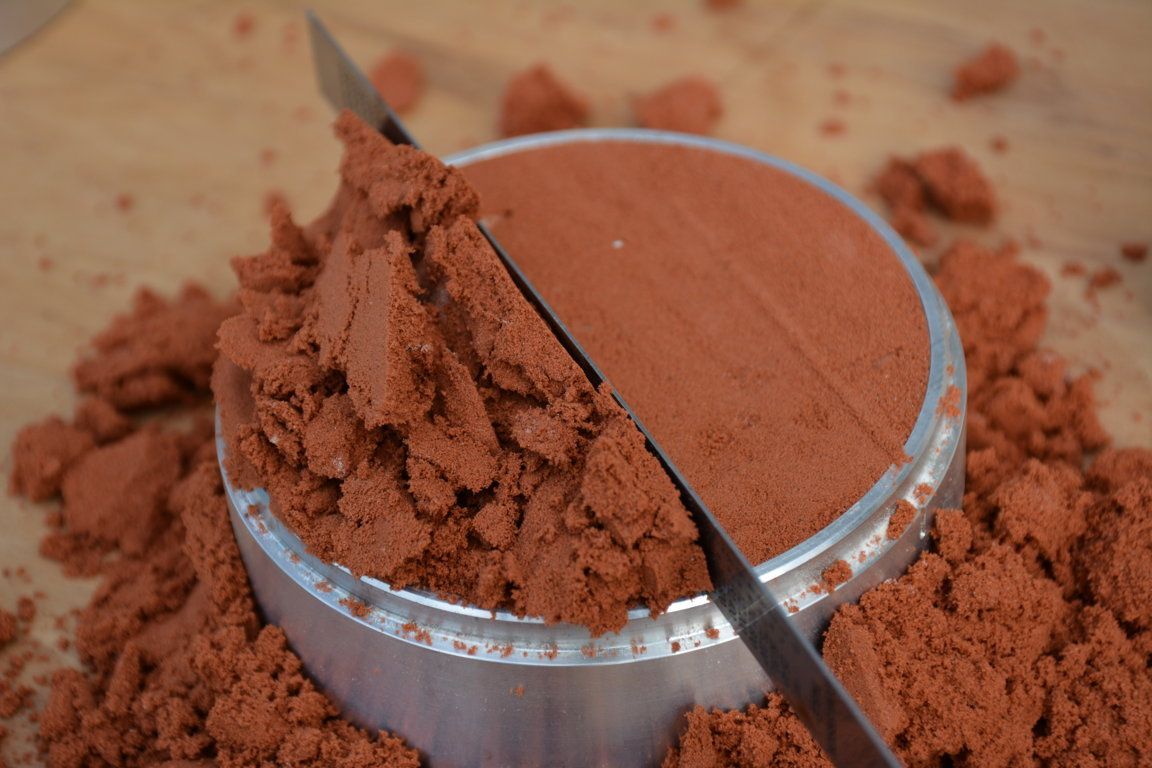
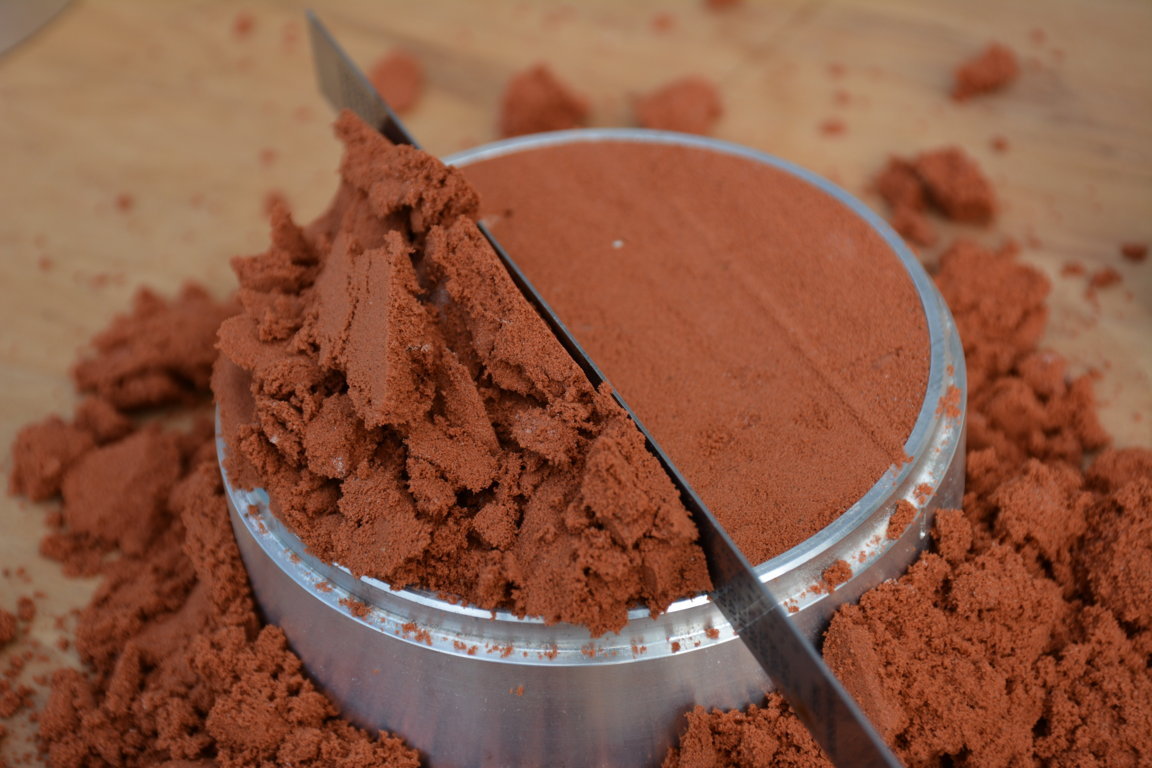
Use a straightedge to "cut of" the excess, making the clay flush with the rim.
Step four
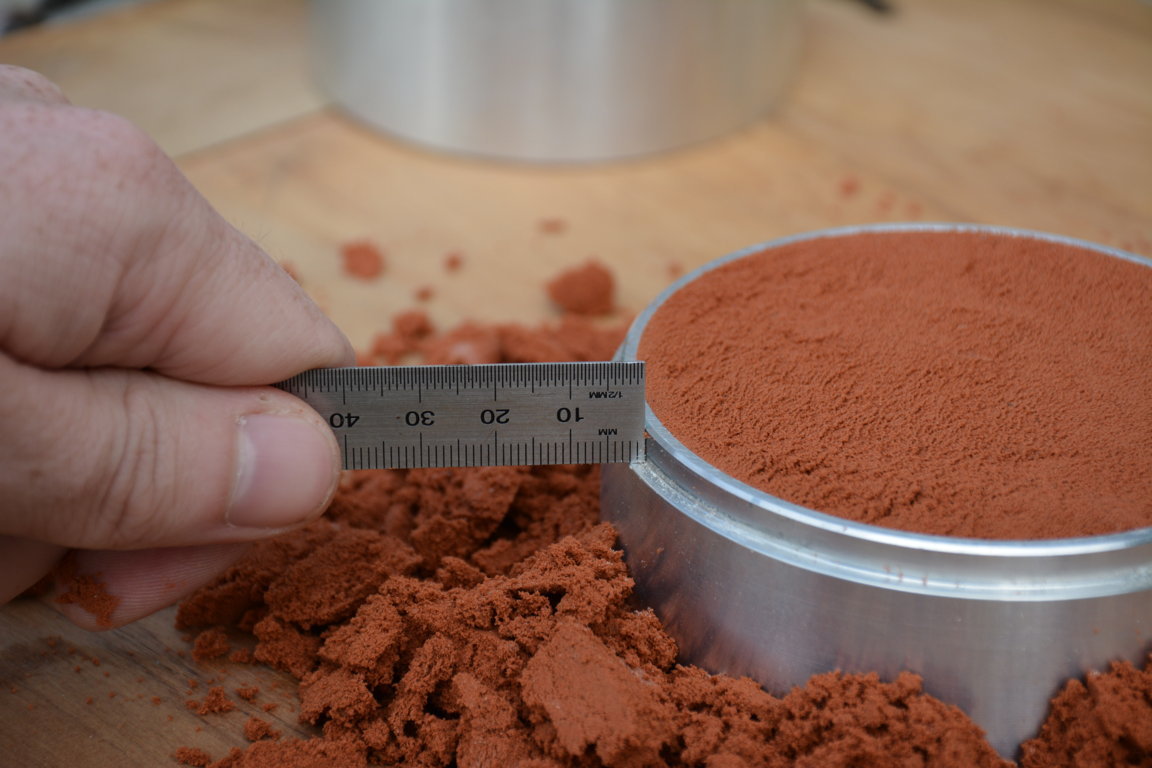
Using the straightedge again remove the clay off the outer rim so the rings can be joined together flush. Then clean up all the unused clay and put it to the side.
Step five
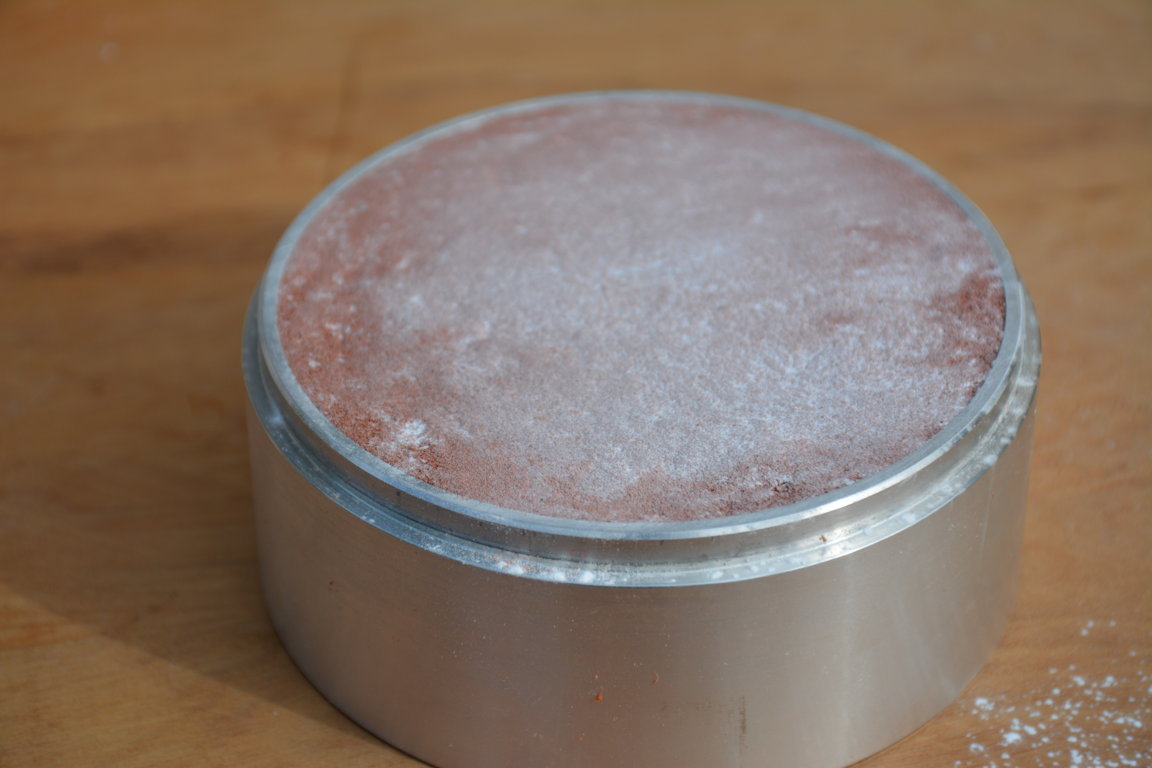
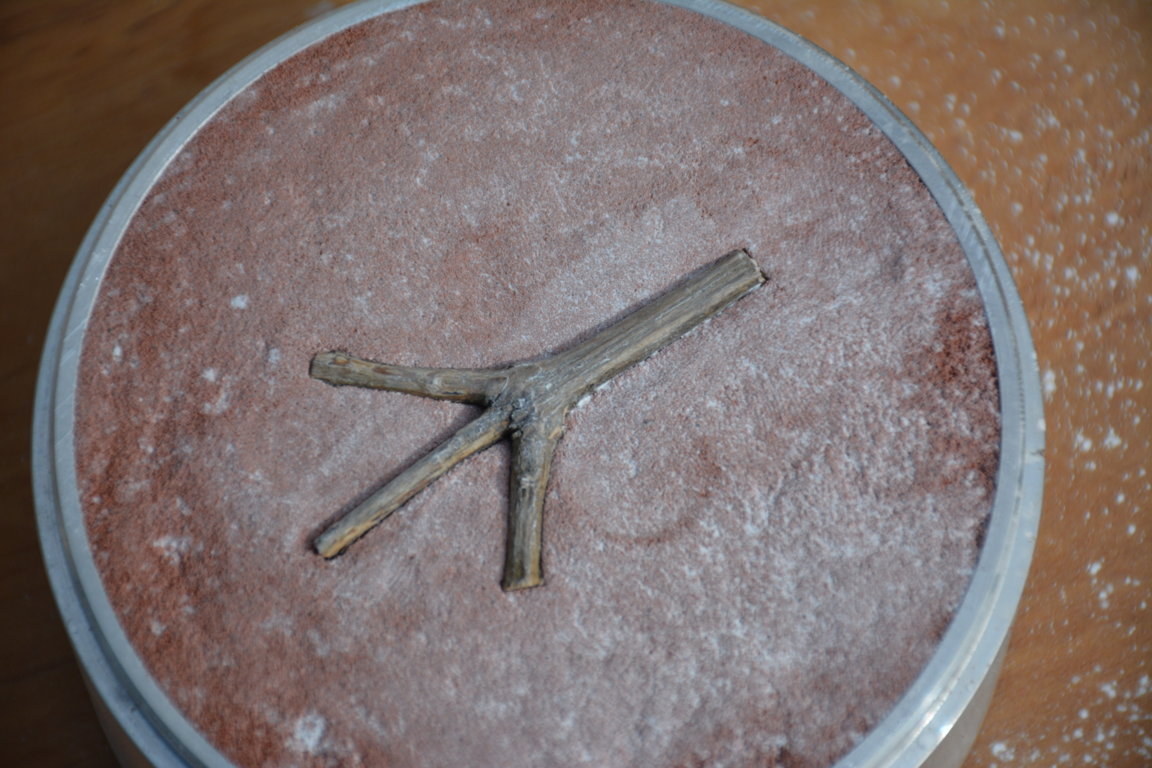
Add talcum powder on top of the delft clay, gently use a light bristle brush or your finger to smooth the talcum powder to cover the whole area of the clay, this is to stop the object we wish the cast and the clay we are going to put over it from sticking and ruining the cast.
Step six
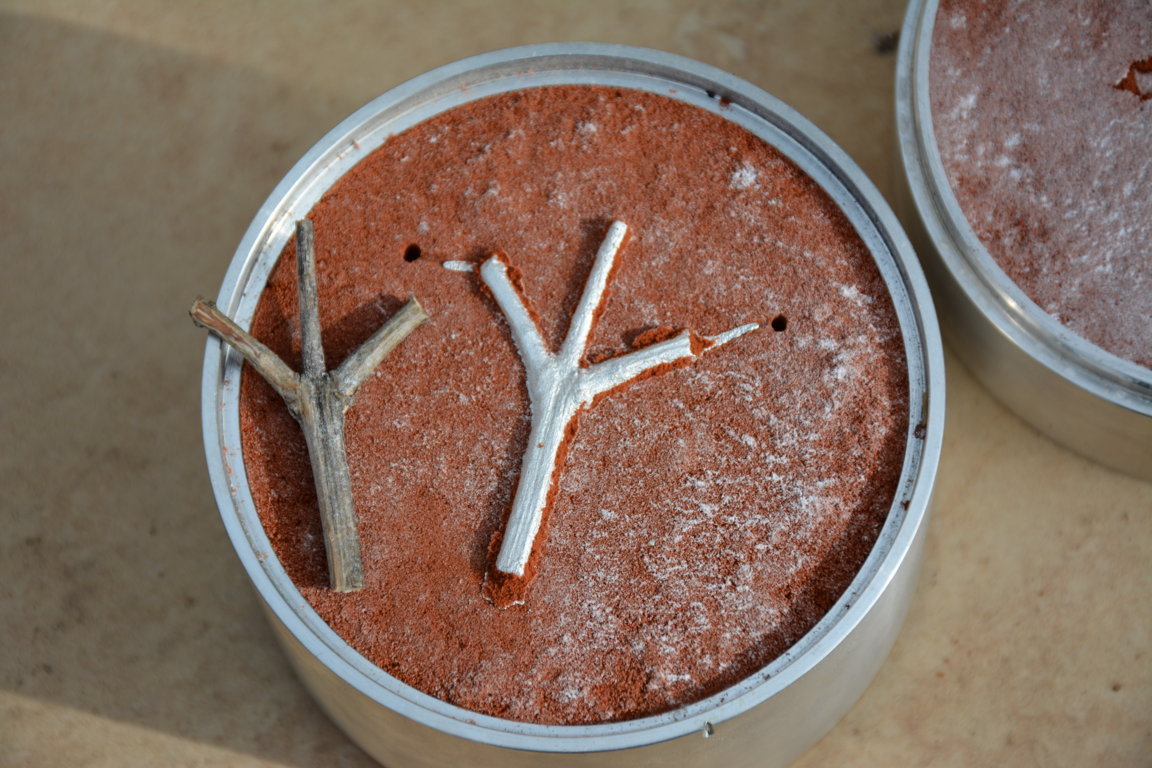
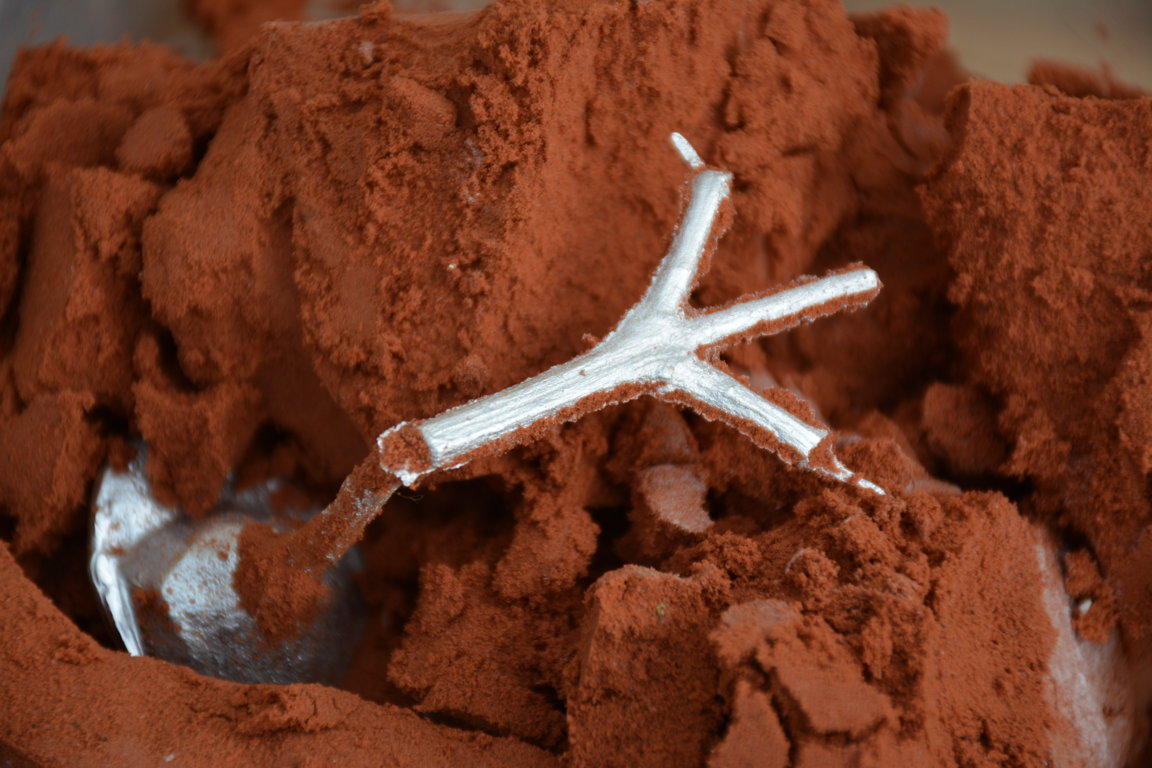
Place the object (twig) you wish to cast in the dead center and evenly apply pressure down till half of the object is submerged into the clay. Once again dust with talcum powder (including the object) and blow the excess off.
Step seven
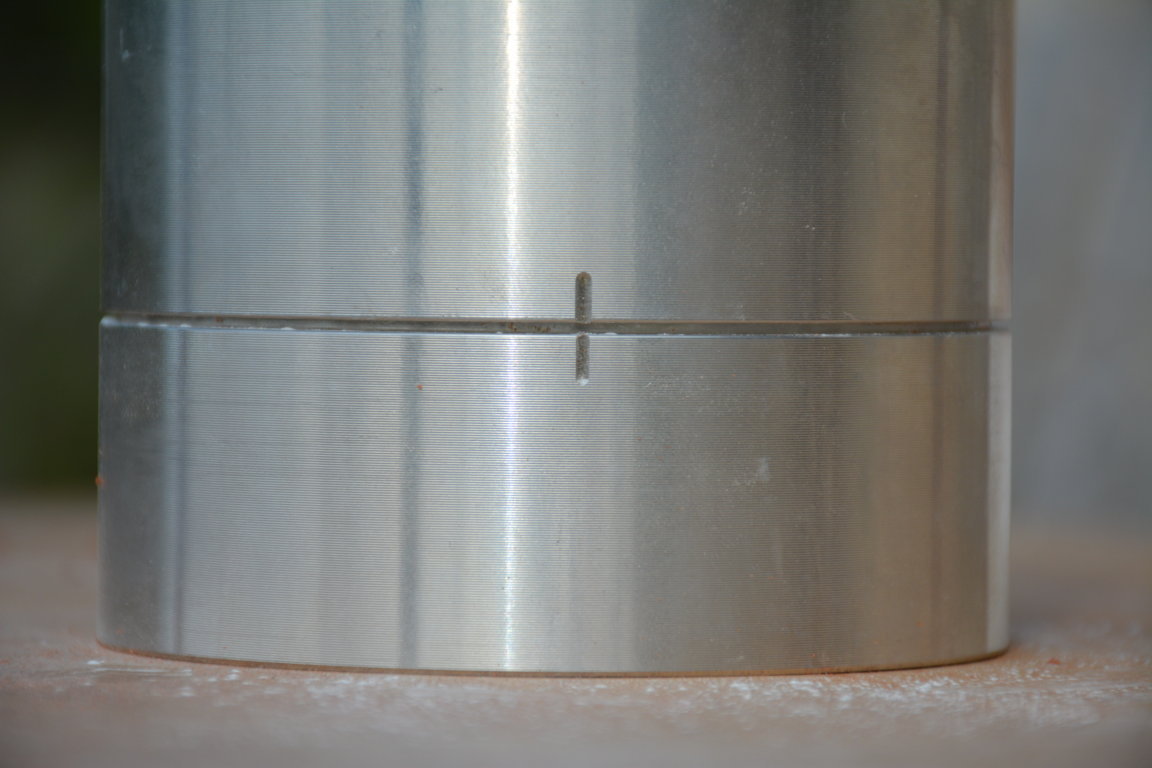
Place the second half (the top) of the aluminum casting rings on top of the bottom half. Make sure the what I call the "center line" is matched up and both rings are evenly connected (which they should be if you followed step four correctly).
Step eight
Just like step two we need to fill the empty top ring with Delft Clay too. Remember to compact the clay as you fill it up.

Step nine
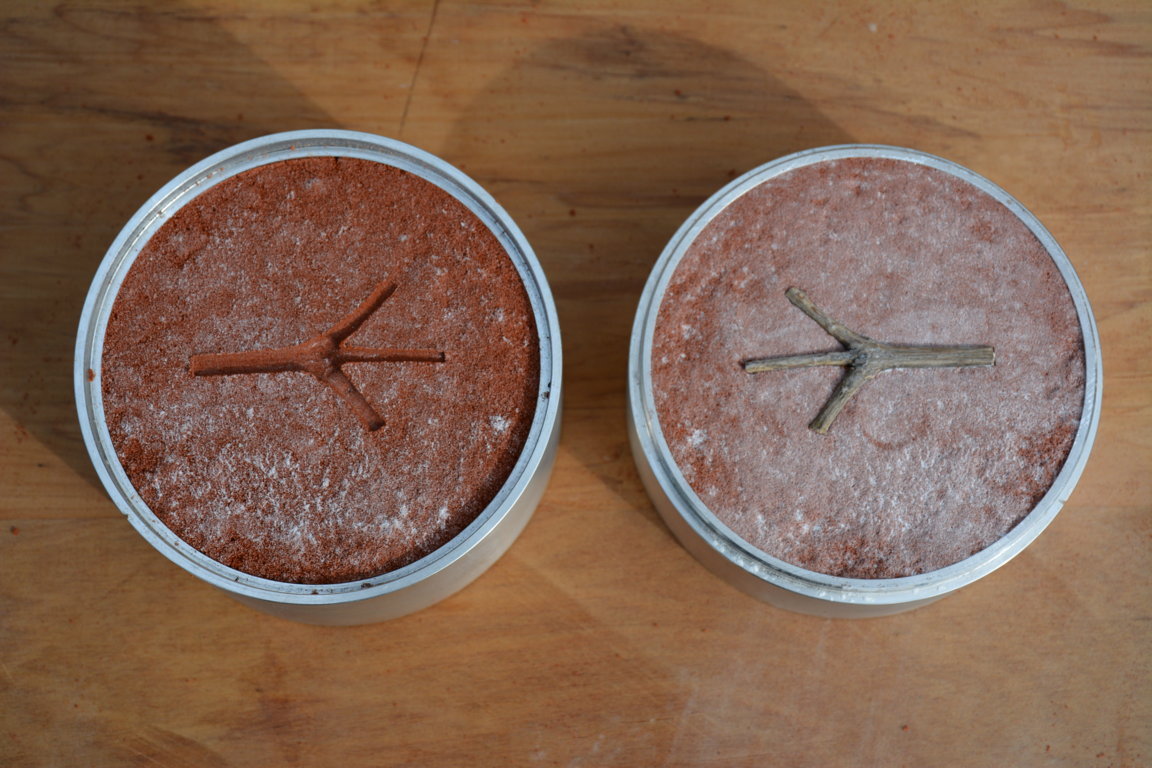
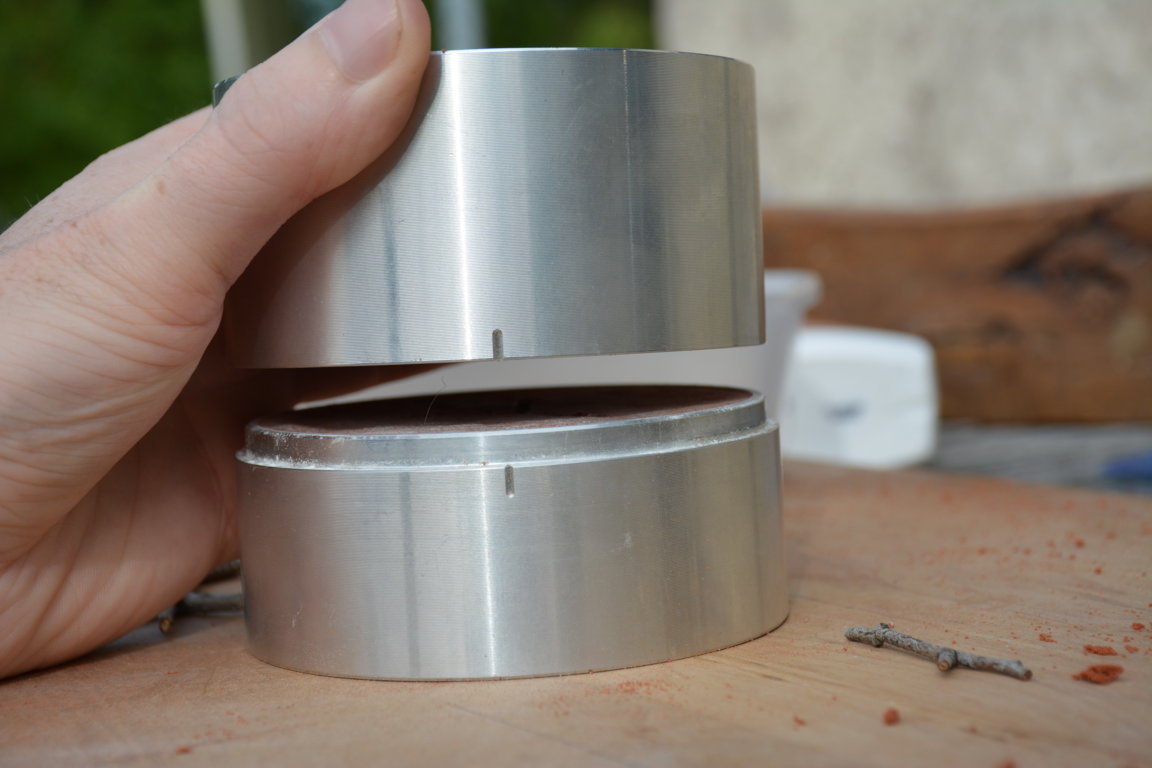
Carefully pull the two rings apart and remove the object (twig). The best way to pull them apart is to hold a ring in each hand and pull them away from each other, under no circumstances twist the rings to loosen them in any way as you will disturb the clay and ruin your "mold" negative impression(s).
Step ten
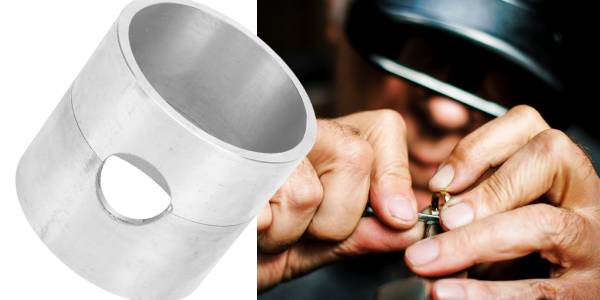
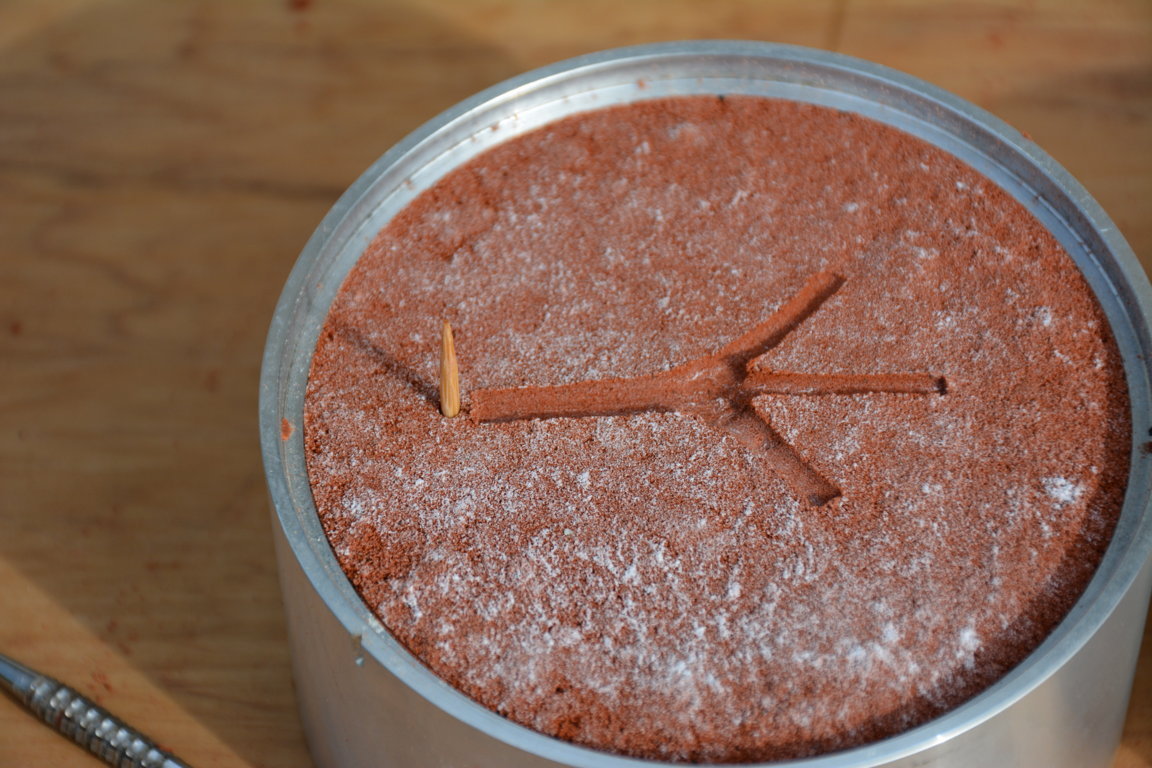
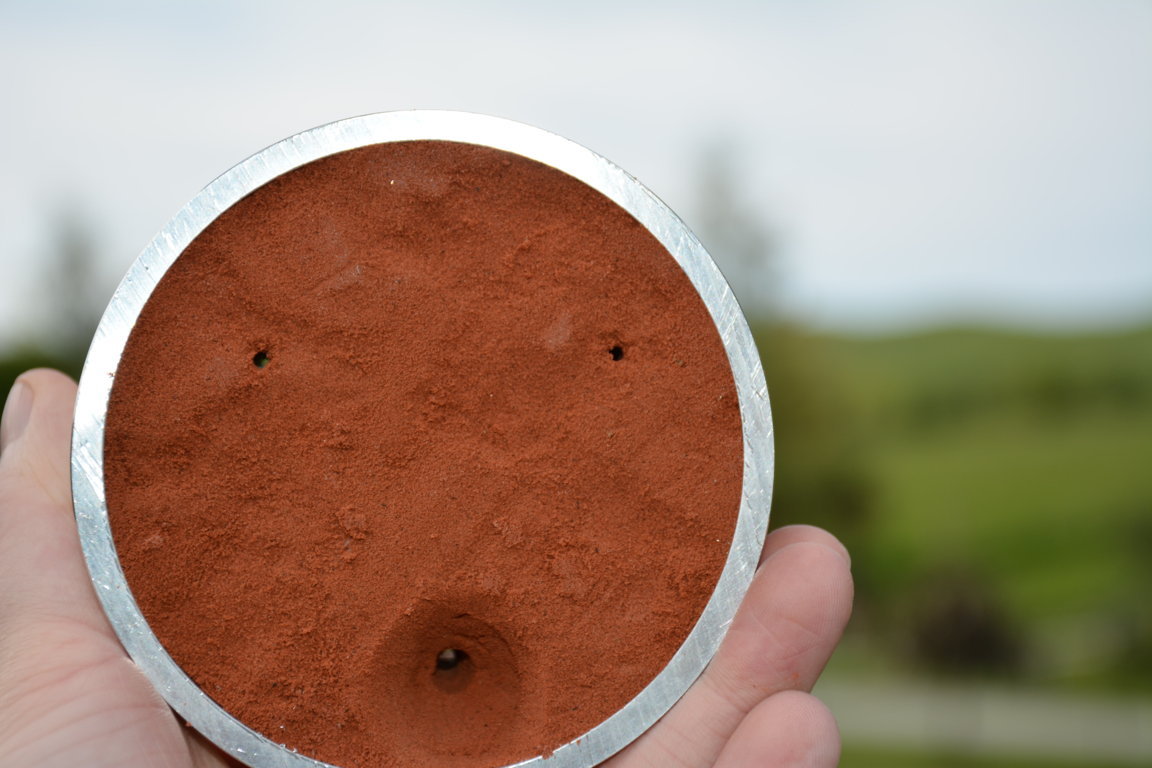
From now on take your time, go slow, and be careful not to wreck your "mold". On the top ring, the one with the outer rim, take a toothpick or similar and make a hole in the clay near the end of the object imprint like the figure below shows.
Step Eleven
Push the toothpick through and pull out the other side (of the top ring).
Step Twelve
Using the knife make the hole made by the toothpick into a funnel shape about halfway down deep this is what we will be pouring the metal down.
Step Thirteen
Using the toothpick once more make the hole wide by circling it around the hole, being careful not to damage the negative impression.
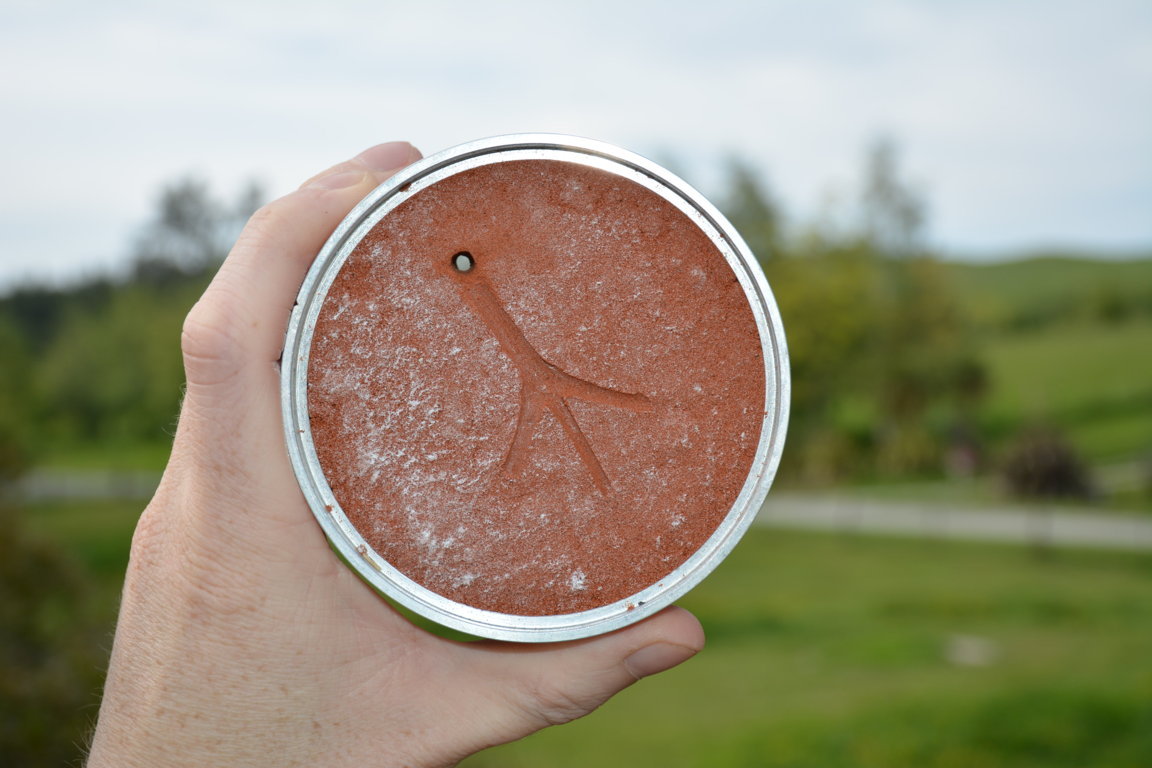
Step fourteen
Make two holes with the toothpick near the "branches" of the twig and then make tiny paths with the toothpick these will act as air holes so the air has somewhere to escape when pouring.
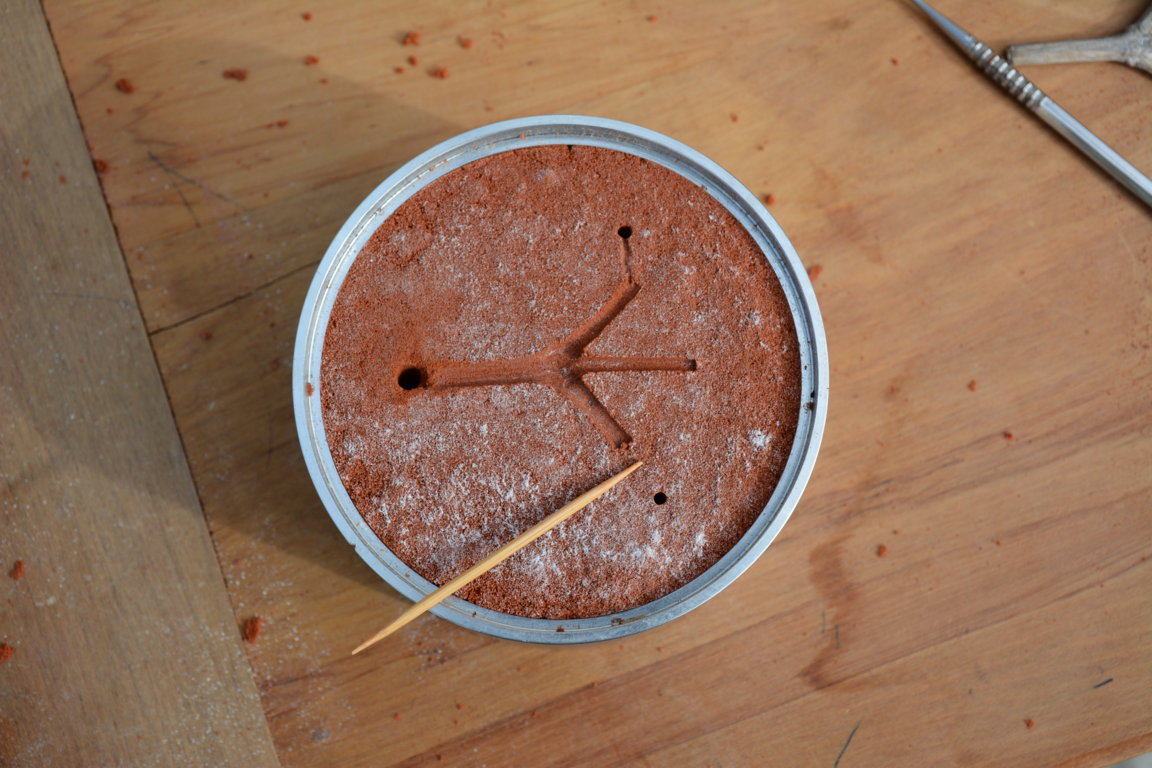
Step Fifteen
Double-check all the holes are holes and haven't "caved in" and rectify them if they have with the use of the toothpick.
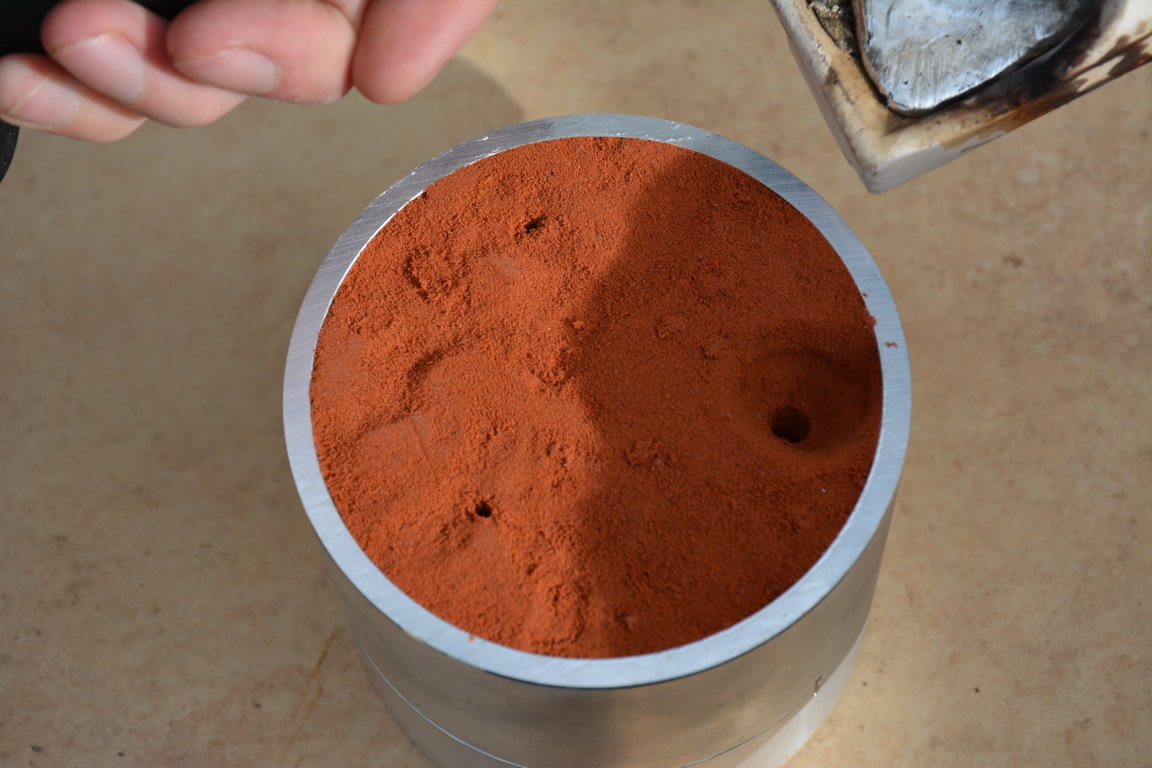
Step sixteen
Carefully align the rings and place them back together (bottom ring with the inner rim on the bottom).
Step Seventeen
Melt how much metal you think you need into a crucible with a blowtorch and then add a bit more. It always pays to have more than less as having too little will ruin your cast. Always wear necessary safety gear: gloves, goggles, etc.

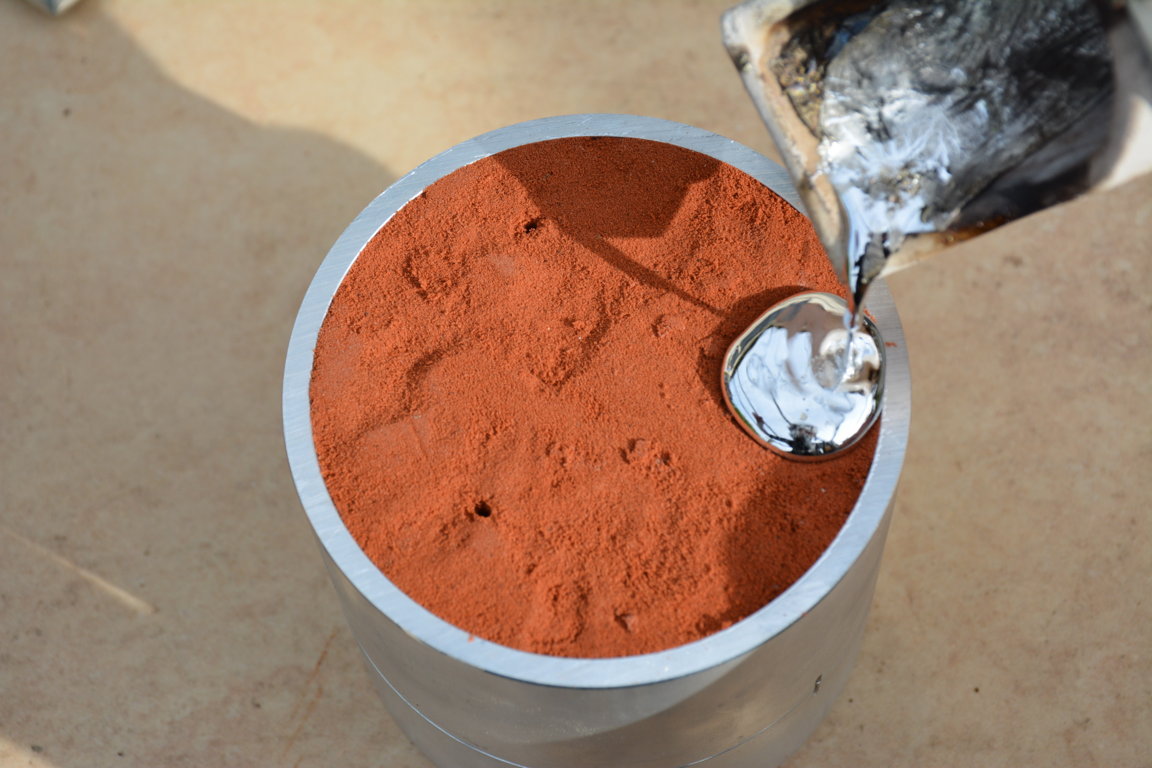
Step eighteen
Have your crucible and blowtorch as near as you can to the rings. Once the metal has melted and the crucible is warmed to the point it's not sucking the heat out of the metal and cooling it straight after you remove the flame. Slowly lift the crucible to the pour hole while moving the blowtorch with it, to keep the metal in its molten state, and in one quick but very controlled motion pour the metal into the pour hole and remove the blowtorch.
Step nineteen
Once you have poured the metal, please wait for it to cool down before touching/moving it. A small pewter object like this won't take very long to cool down maybe 10 minutes tops.
Step Twenty
Once cooled you can pull apart the ring and see what you have.
Finished (well Almost)
20 steps! and we are still not finished! you will need to finish off the casting by cutting the spur off (the funnel that we used to pour the metal) and snipping off the little air hole paths, you may also need to sand, file, and polish depending on your cast quality and wanted result.
Thanks for sticking it out and reading the whole tutorial, all the best with your future casting :)